Growing morels is fascinating, but it remains a technical and unpredictable process. This guide provides a clear step-by-step plan for growing black morels outdoors, from preparing the soil to the " harvest." The dates are approximate: always check the soil, the mycelium, and the weather before taking any action.

What you should know before you start: Good soil colonization does not guarantee a successful “ fruiting.” Soil, winter climate, irrigation, “ strain,” nutrition, and the microbiome all play a role. Treat the first season as an experimental growing season and keep track of your observations.
Table of Contents

To get started with your garden
Our morel mushroom mycelium on grains is produced at La Mycosphère in our BE-BIO-01-certified organic laboratory. A 1.5-kg bag is enough to inoculate approximately 5 m².
See the morel mycelium View the nutrient bags1. Understanding the crop cycle
Modern protocols primarily concern certain black morels that can be cultivated in soil, notably Morchella importuna, M. sextelata, and M. eximia. The nutritional mode of morels is more complex than a simple distinction between “saprophytic” and “mycorrhizal” species: therefore, not all wild species behave like the strains selected for cultivation.
In temperate European climates, the external life cycle is seasonal: the mycelium is generally sown in the fall, colonizes the soil and exogenous nutrients, matures during the winter, and then may produce fruiting bodies in the spring. Sclerotia are compact storage structures often observed during this cycle. They serve as an important indicator in many cultivation systems, though they do not, on their own, guarantee fruiting.
| Estimated time frame | Phase | What you see | Keynote Address |
|---|---|---|---|
| Spring to Late Summer | Preparation | Covered, living, and well-drained soil | Analyze, correct if necessary, and prepare the tapes |
| October through December | Settlement and Colonization | White to gray mycelium visible on the surface | Sow, water, cover, then apply fertilizer |
| Fall and Winter | Winter maturation | Mycelium sometimes orange or brown; sclerotia may be present | Keep moist without over-wetting, and do not handle further |
| End of Winter | Preparation for the fruiting | The ground is warming up over the long term | Check for moisture and, if necessary, water thoroughly before the pins |
| February through May, depending on the region | pins and growth | Tiny caps, then young morels | Switch to very gentle watering and manage the microclimate |
2. Choose the location and equipment
The Right Location
Choose a spot that is sheltered from the wind, bright but not in direct, intense sunlight, and easy to water. It should be able to warm up as winter ends while remaining cool and moist. A small structure with a shade net or a shade cloth makes it much easier to manage the microclimate. Avoid low-lying areas where water pools and areas exposed to heavy rain.
It is still possible to grow plants without a shelter in a open understory, north of a wall, or near a hedge, but the conditions there are harder to control. Under deciduous trees, keep in mind that the shade disappears in winter.
Recommended Minimum Equipment
- a soil thermometer to be placed about 10 cm deep;
- a thermo-hygrometer placed about 10 cm above the ground;
- a gentle irrigation system: fine spray, micro-sprinklers, or misting;
- a shade net or a protective screen;
- protection against rodents, if they are present.
Why take measurements near the crops? The air temperature reported by the weather forecast can differ significantly from the soil temperature. When deciding whether to plant or water after winter, local measurements are much more useful.
3. Prepare the soil
Texture, Drainage, and pH
Look for soil that is alive, permeable, and capable of retaining moisture without becoming waterlogged. Well-balanced soils that are predominantly loamy or sandy-loamy are generally easier to work than compact clays or highly permeable sands.
- pH: Many black morel cultivation protocols use neutral to alkaline soil, typically ranging from 6.5 to 8. Test the soil before applying any lime. If the pH is above 7, correction is generally not necessary.
- Texture: Work the top 10 to 15 centimeters of soil without breaking it up. A clumpy texture, with clumps as large as an egg, promotes aeration.
- Beds: Create raised beds about 80 cm to 1 m wide, with drainage channels to allow excess water to drain away.
- Chemicals: Avoid fungicides, soil disinfectants, and herbicide residues. Glyphosate is a herbicide, not a fungicide, but its presence is undesirable on a crop plot.
Do you need to add lime to grow morels?
Cultivated black morels generally thrive in soils that are near-neutral to slightly alkaline. However, it is not necessary to routinely add lime.
Before making any changes to your soil, we recommend that you test its pH. In many protocols, a pH range of approximately 6.5 to 8 is recommended, depending on the strain , and growing conditions.
Which amendment should I choose?
-
Calcium carbonate (CaCO₃) : This is the best soil amendment to use if your soil is too acidic. It helps gradually raise the pH. You can find it at garden centers in the form of finely ground agricultural limestone.
-
Gypsum (calcium sulfate) : It provides calcium and sulfur, but does not significantly correct a pH that is too acidic. Its use is not essential for growing morels.
-
Slaked lime (Ca(OH)₂) : highly alkaline and fast-acting, it is primarily used in mushroom cultivation for certain substrate pasteurization techniques. We do not recommend it for routine pH adjustment of soil intended for morels.
Our advice: If your soil already has the right pH, do not add any lime. If it is too acidic, opt for agricultural calcium carbonate and adjust the amount based on your soil's characteristics.
The success of the crop also depends on many other factors: the quality of the mycelium, humidity, temperature, soil structure, and nutrient management.
Organic matter: Avoid excesses
Soil that is already rich and alive does not necessarily need to be enriched. Excessive fertilization just before sowing can disrupt the soil’s balance and increase microbial competition. If the soil is poor, work in a moderate amount of partially decomposed plant matter in the spring or early summer: mature hardwood compost, composted BRF, straw, or broken-down plant fibers. Avoid fresh wood, highly acidic materials, and large amounts of nitrogen.
The soil microbiome appears to play a role throughout the entire cycle. Studies have observed significant changes in bacterial communities during colonization, pins , and fruiting. However, this does not allow us to conclude that a single bacterium, such as Pseudomonas putida, is essential, nor that a specific inoculant would guarantee harvest.
Rotation: Field reports often show a decline in performance when the same strip is used for several years in a row. If possible, change locations each season, or allow for at least one season of rotation after two to three cycles.
4. Sow the mycelium
When should you plant?
Sow when the autumn heat has passed and the temperature 10 cm above the ground remains consistently below 20 °C. Depending on the region and how sheltered the area is, this is often in October, November, or December. Don’t rely solely on the calendar: check the temperature at the hottest time of the day.
Use the mycelium shortly after receiving it. If conditions do not allow for immediate planting, store it in the refrigerator at a temperature between 1 and 5 °C—without freezing it—and follow the storage period indicated on the product sheet.
Recommended method: the double groove
Double-furrow spot seeding helps ensure consistent inoculation and connection to the nutrient bags. This is the method we recommend for beginners.
- Thoroughly moisten the soil. The soil should be cool and moist, but neither muddy nor waterlogged.
- Dig two parallel furrows. On a strip 80 cm to 1 m wide, space them about 40 to 45 cm apart. A depth of 5 to 6 cm and a width of about 10 cm are appropriate.
- Break up the mycelium without crushing it. Distribute it evenly across the two furrows. With our mycelium, allow about 250 to 300 g/m², or one 1.5-kg bag for about 5 m².
- Cover without packing down. Add 2 to 4 cm of soil, then gently smooth it out. The soil should remain well-aerated.
- Water immediately. Use a fine spray until the soil is thoroughly moistened, taking care not to create ruts or dislodge the seeds.
Two possible alternatives
| Method | Principle | Benefit | Limit |
|---|---|---|---|
| Pockmarks | Spread the mycelium in localized areas spaced about 40 to 50 cm apart, then cover with 2 to 4 cm of soil. | Makes it easier to position the feeding tube. | Colonization is less uniform if the holes are too far apart. |
| On the fly | Spread 250 to 300 g/m² over the entire strip, then cover it. | Fast over a large area. | More susceptible to drying out and harder to care for; best suited for experienced growers. |
Covering After Sowing
After watering, cover the bed with an opaque material that reduces wind and evaporation while allowing air to circulate. Avoid letting a waterproof tarp lie flat on the soil for extended periods. Monitor the temperature regularly: a dark-colored material can cause overheating on sunny days.
5. Observe the mycelium and place the nutrient bags
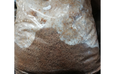
Under the right conditions, white to grayish patches may appear on the surface. These circular patterns are sometimes called “blazes.” Their appearance depends on the temperature and can take about one to two weeks.

An example of visible mycelium growth on the soil surface.
The Right Time
Set the bags down once the mycelium has clearly established itself on the surface, which usually takes 7 to 15 days after sowing, depending on the temperature. Observation is more important than a fixed number of days. Do not wait until the surface is completely white or until the soil dries out.
Quantity and Setup
For our 1-liter bags, you should generally plan on one bag per square meter. Depending on your test results, your soil, and the application method you choose, the rate may go up to two bags per square meter. The volume of the bags varies from one manufacturer to another: do not directly apply the number of bags specified in another protocol.
- Wash your hands and clean the outside of the bag if it has gotten dirty.
- Using a clean blade, make a few small cuts, 2 to 3 cm long, on the side that will be placed against the floor.
- Place each opening directly on an area of active mycelium, without pressing down or disturbing the soil.
- Weigh down or protect the bags from rodents if necessary.
- Put the cover back on and do not move the bags anymore.

Nutrient Bags for Morels
Our sterilized bags provide the exogenous nutrients used by the mycelium after it has been planted in the soil. They are certified organic under BE-BIO-01.
Choosing Nutrient-Rich BagsDo not substitute fruit or food scraps for the bags. These materials are difficult to measure accurately and are more likely to attract mold, insects, and rodents.
6. Coping with Fall and Winter
After placing the bags, maintain a consistent level of moisture. Water generously a few days later if the soil needs it, then slightly lift the opaque cover or replace it with a breathable cover. The visible mycelium may then change color, become sparser, or disappear from the surface—this does not necessarily mean the culture has died.
During the winter, the mycelium continues to mature in the soil and feed on nutrients. Seasonal cold contributes to this phase, but sclerotium formation and the “ fruiting ” also depend on nutrient gradients, moisture, pH, the microbiome, and the “ strain.” It is therefore more accurate to speak of winter maturation or vernalization than of a single requirement to “drop to 5 °C.”
Should we take the bags out?
Systematically removing them two or three weeks before the " fruiting " is not a universal rule. After about 60 to 75 days of contact, visually inspect their condition:
- clean or normally colonized sac: it can generally remain in place until the onset of the fruiting, or even longer;
- A bag that is severely deteriorated, malodorous, or heavily contaminated: Remove it carefully without disturbing the soil;
- Rodents: Protect your bags instead of moving them around regularly.
Watering varies depending on the stage
| Phase | Objective | How to Water | Things to Avoid |
|---|---|---|---|
| Seeding | Moisten thoroughly and bring the mycelium into contact with the soil | Full-coverage irrigation with fine spray | Erosion, exposed soil, standing water |
| Colonization | Prevent Drying Out | Water only when necessary, gently or through the footpaths | Repeated cycles of drought and saturation |
| Winter | Keeping the Soil Cool | Take advantage of the rain and adjust accordingly based on the soil texture | Watering Frozen or Already Waterlogged Soil |
| Before pins | Restore soil moisture reserves | Deep watering if conditions and the weather warrant it | Intervening too late, when the " pins " are already present |
| pins | Maintain the microclimate without mechanical stress | Misting, micro-sprinkling, humidification of footpaths or screens | Large drops falling directly onto the blanks |
| Young morels | Prevent the plant from drying out during growth | Light, intermittent watering, preferably in the morning | Excess water, heat trapped under a tarp, heavy watering |
7. Prepare the fruiting for the end of winter
Late winter is the most delicate phase. Monitor the temperature at a depth of about 10 cm. When the soil temperature consistently exceeds about 6 to 8 °C and severe frosts are no longer a threat, the crop enters its pre- fruiting al phase. This range is a guideline, not an automatic trigger.
- Gradually remove the opaque cover. Don’t wait until the weather gets hot: pins may appear very subtly under the cover.
- Carefully examine the surface. Look for tiny spots or bumps about a millimeter in size before proceeding with large-scale irrigation.
- Assess the existing water supply. If the soil is moist at depth and rain is forecast, a large additional watering may not be necessary.
- If necessary, water thoroughly before planting the pins. Water deeply, but without leaving puddles or causing the row to become waterlogged.
- Set up the shelter at fruiting. Use a sheer fabric or netting that provides light shade, moisture, and air circulation.
The main risk is watering too heavily too late. If the first pins are already visible, do not water heavily directly on the strip anymore.
8. Identify and protect the pins
pins s are the first visible signs of morels. They can measure about 1 mm and blend in with the soil. At this stage, they are particularly sensitive to heavy rain, drying out, frost, and rapid changes in the microclimate.
As soon as they appeared
- Stop the heavy watering on the strip;
- Maintain a humid environment near the ground by misting, micro-sprinkling, or moistening the walkways or the netting;
- Maintain good ventilation to prevent constant condensation and mold;
- Keep an eye on the temperature under the shelter, which can rise very quickly in the sun;
- Do not step on the conveyor belts or move the bags anymore.
In a controlled system, high humidity near the ground—often around 85 to 90 percent during the very early stages—can limit desiccation. This figure must be interpreted in conjunction with ventilation, temperature, and the actual condition of the surface: maintaining maximum humidity at all times is not a goal in and of itself.
9. Supporting the growth of young morels
Once the young morels are well-formed and reach a few centimeters in size, they become less fragile. Nevertheless, continue to water them lightly, in small amounts, and preferably in the morning. The goal is to keep the soil moist and the caps cool, without soaking the fruiting bodies.
- Keep the light diffused and avoid direct sunlight.
- Ventilate more frequently if condensation persists or if mold appears.
- Protect your crops from slugs by using barriers and manual monitoring methods appropriate for your situation.
- Use Bacillus thuringiensis only against the insects targeted by the approved product and in accordance with the label. It is not effective against slugs.
- Quickly remove any fruiting bodies that are clearly rotten or diseased without disturbing the patch.

10. What should I look for? Diagnostic Chart
| Observation | Possible interpretation | What should I do? |
|---|---|---|
| White or gray mycelium that spreads across the surface | Active colonization | Place the feeding tube once the implant is clearly in place, then leave it undisturbed |
| Orange or brown mycelium | May be due to aging; this color is not necessarily a sign of contamination | Observe the smell and how it changes, without disturbing the soil |
| Surface mycelium that disappears after watering or in the winter | The network can remain active beneath the surface | Do not automatically resow; monitor moisture and temperature |
| Nutrient bag that has been colonized since it was opened | Connection to the mycelium established | Leave it in place as long as the bag remains intact |
| Green, black, slimy, or smelly bag | Significant contamination or degradation | Carefully remove the bag in question; do not spill its contents |
| Water that remains in puddles on the conveyor belt for several hours | Insufficient drainage or excessive irrigation | Stop watering, improve drainage through the foot holes, and aerate |
| Surface that dries out and cracks | Wind, heat, or insufficient irrigation | Increase shading and gradually increase humidity, avoiding sudden changes |
| Small heads, 1 to 2 mm in size | pins possible | Immediately remove large drops from the strip |
| Young morels drying | Humidity too low, wind, or overheating | Provide shade, humidify the air near the ground, and regulate the temperature |
| Good colonization, but no morels | One or more fruiting requirements have not been met | Record temperatures, water levels, dates, and the condition of the bags so you can adjust accordingly for the next season |
11. Harvesting, Storing, and Eating
Harvest the morels when they have reached a satisfactory size and before they become too old or start to deteriorate. Cut the stem cleanly at the base. If possible, avoid harvesting immediately after watering or a heavy rain: mushrooms that are saturated with water are more fragile and do not keep as well.

- Arrange the morels in thin layers in a crate or a well-ventilated container.
- Clean them gently, without soaking them for too long.
- Store them in the refrigerator for a few days or dry them quickly.
- Morels must always be cooked thoroughly before eating. They are poisonous when raw or undercooked.
Food safety precaution: When trying a mushroom for the first time, start with a small amount, even after cooking. Never eat a mushroom if you have any doubts about its identification or safety.
12. Frequently Asked Questions
Is it normal for morel mycelium to be brown or orange?
Yes. The mycelium can change from white or gray to orange and then to brown as it matures. An abnormal color should be evaluated in conjunction with the odor, texture, and rate of change, not in isolation.
How much mycelium and nutrient bags are needed?
With our products, allow for approximately 250 to 300 g of mycelium and, typically, one 1-liter nutrient bag per square meter. A 1.5-kg bag of mycelium and five nutrient bags are therefore sufficient for approximately 5 m². The dosage can be adjusted for a specific trial, provided you do not exceed the guidelines listed on the product sheet.
Can I use tap water?
Clean rainwater is a good option, but tap water isn’t automatically unsuitable for growing plants. Take into account its hardness and how it’s treated. Avoid contaminated water, salt water, or water from a stream whose quality is unknown.
Do we need to remove all the bags before the “ fruiting ”?
No. After about 60 to 75 days, check them. Remove any bags that are heavily contaminated or damaged; a healthy bag can stay in place longer. Above all, avoid disturbing the soil.
Should I water my plants in the winter?
It depends on the rain, the ground cover, and the soil texture. The soil should remain cool and moist, but not waterlogged. Do not water frozen or already saturated soil.
When should you give the plants their final deep watering?
At the end of winter, before the first pins appear, when the soil temperature consistently exceeds about 6 to 8 °C at a depth of 10 cm. First, check the actual soil moisture level and the rain forecast: this watering isn’t always necessary.
Can morels be grown in pots or indoors?
There have been some experiments, but they are even more demanding than outdoor cultivation. A pot dries out or becomes waterlogged quickly and does not adequately replicate the winter ripening process. To start, choose a small, sheltered patch of open ground.
Will the crop definitely succeed?
No. The mycelium can colonize the soil without producing morels. The fruiting depends on a combination of biological and climatic factors. No yield can be guaranteed.
For further reading
This protocol combines our observations, feedback from growers, and published knowledge on modern Morchella cultivation. Research is ongoing, particularly on exogenous nutrition, microbial interactions, and the exact conditions required for the initiation of pins.
- Dynamics of the Soil Microbiome During the Morchella sextelata Growth Cycle
- Scientific Journal on Morel Mushroom Cultivation and Exogenous Nutrition
- Overview of the Development and Cultivation of Morchella
Ready to give it a try?
Combine grain-based mycelium with the appropriate nutrient bags, then keep a record of your dates, temperatures, and watering schedules to improve your results from one growing season to the next.
Order the mycelium Order NutritionLast updated: September 2026. This guide covers the outdoor cultivation of morel strains selected for cultivation. Always adapt your practices to the local climate and the characteristics of your soil.

About the author
He has been working for several years on mycelium cultivation, organic mushrooms, and functional extracts. Through his articles, he shares practical expertise gained from the production, experimentation, and processing of mushrooms.
Discover the Mycosphere