
DIY Mushroom Kit
- 🍄 ORGANIC DIY OYSTER MUSHROOM KIT: Everything you need in one box to make your own fruiting blocks .
- 🌱 EASY TO GROW: Super simple to do at home, at school, with your kids, or with your friends—just follow our instructions.
- 💪 HIGH YIELD: 0.6 to 1 kg per bale.
- 🍽️ NUTRITIONAL VALUE: Oyster mushrooms are rich in protein, vitamins, and minerals, making them perfect for a balanced diet.
- 🌍 ORGANIC PRODUCTION: Certified "BE-BIO-01," pesticide-free and GMO-free, environmentally friendly.
- ⏳ STORAGE: You can store the mycelium in the refrigerator for up to 1 month until you're ready to use it.
To go with your kit


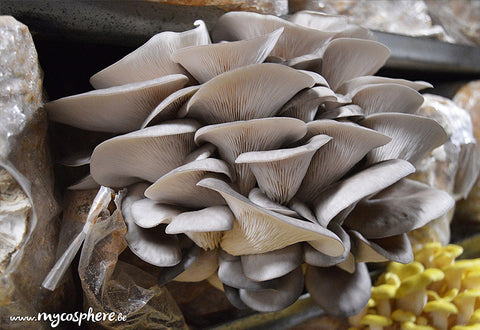
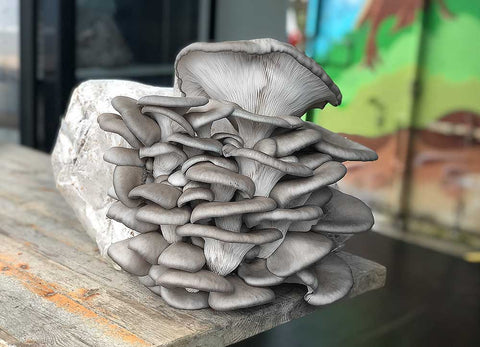
Make your own fruiting blocks harvest your own oyster mushrooms at home.
This complete kit makes it easy to learn about mushroom cultivation, whether on your own, with your family, or at school. It’s a fun and accessible activity that lets you watch the mycelium grow and then harvest beautiful, fresh oyster mushrooms.
How does it work?
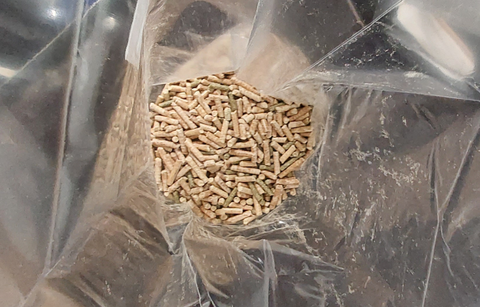
Moisten the pellets with water and lime.
Mix it into the growing medium, then reseal the bags.
Leave the bags at 20 °C for about 2 weeks.
The oyster mushrooms will then appear in 1 to 2 weeks.
See the detailed instructions
Start by cleaning all work surfaces with soapy water, as well as your hands and forearms. Work in a clean environment.
-
Preparing the bags
Divide the lime among the 5 bags, using one teaspoon per bag. Add 2 liters of water per bag and let the pellets absorb the water for about 5 minutes.
For mini-kits, the lime is already included in the pellets. It enriches the substrate with calcium and raises the pH to limit the growth of bacteria and mold. It may be slightly irritating to sensitive skin: avoid direct contact or wash your hands after handling. -
Adding the mycelium
Add approximately 300 g of mycelium per bag. -
Sealing the bags
Seal the bags with tape or a sealer. -
Mix Gently mix to distribute the mycelium evenly throughout the substrate. -
Colonization
Leave the bags for about 2 weeks at 20 °C, away from direct light, so that the mycelium can fully colonize the substrate. -
Opening the "
" bag: Squeeze the air out of the bag, then make a 5- to 10-cm slit on the side, at the level of the substrate, to allow the oyster mushrooms to grow. We recommend covering the filter with adhesive tape at this point to prevent the mushrooms from trying to escape through that opening. -
Humidity
Maintain proper humidity by misting daily, or by placing the bag on a large plate with a damp cloth underneath. -
Growth Oyster mushrooms usually begin to develop and open within 1 to 2 weeks. -
harvest
Harvest before the caps open and release their spores. Oyster mushrooms grow quickly: keep a close eye on them. A harvest later harvest is still possible, but the mushrooms may be slightly less tender and flavorful.

Each bag can produce 2 to 3 harvests. In total, you can expect to get about 600 g to 1 kg of oyster mushrooms per bag, or up to 3 to 5 kg from the 5 bags in the Maxi-Kit. After each harvest, let the bag rest for 3 to 5 days, then rehydrate it by soaking the bag overnight in a basin of water.
To space out the harvests, you can place some of the bundles in the refrigerator or in a cooler room after they have been planted.
Should I choose the Mini or the Maxi DIY Kit?
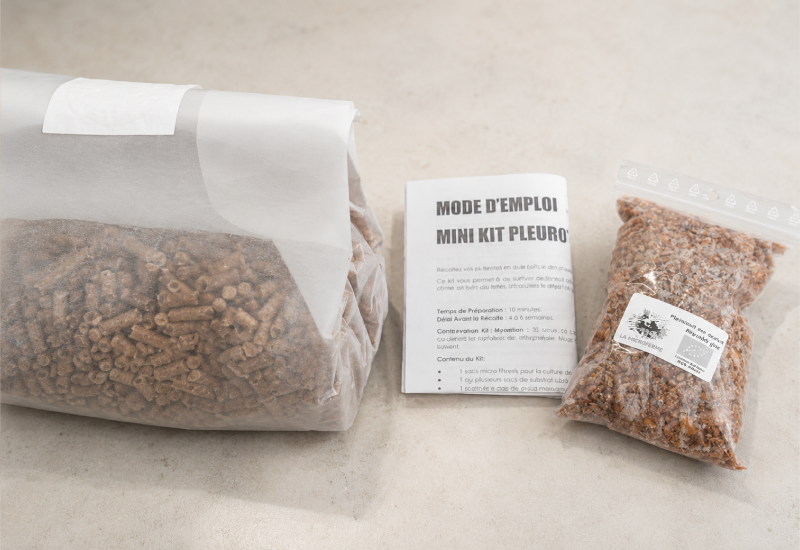
DIY Mini Kit
- 1 bag with a breathable microfilter
- 1 kg of organic straw pellets with lime included
- 300 g of oyster mushroom mycelium
- PDF User Guide
DIY Maxi Kit
- 5 bags with breathable microfilters
- 5 kg of organic straw pellets and slaked lime
- 1.5 kg of oyster mushroom mycelium
- Pair of gloves
- Mini spray
- PDF User Guide
Precautions
- Work as cleanly as possible: wash your work surfaces and your hands before you begin.
- Even though it is slaked, lime can be irritating to the hands. Avoid direct contact, or wash your hands immediately after handling it.
- The timing may vary depending on the temperature. Cold weather slows down the mushroom's metabolism and can delay the harvest.
- It is recommended that you use the mycelium all at once. If you wish to use it in several sessions, work cleanly, reseal the bag carefully after each use, store it in the refrigerator, and use it within 2 to 3 weeks.
Use this kit as an educational activity
This kit is perfect for a hands-on activity about mushrooms, whether at school or at home. It allows you to observe the development of mycelium, the growth of oyster mushrooms, and the essential role mushrooms play in nature.

Learning Objectives
- Understand that a mushroom is not a plant, but the fruiting body of a mycelium.
- Observe its life cycle: colonization, fruiting harvest.
- Learn about its role as a decomposer in ecosystems.
- Explore the concepts of metabolism, reproduction, and the classification of living organisms.
Science Project Ideas for Kids
- Compare two environments— humidity, light, or ventilation—while maintaining a control group.
- Tracking growth: photographing or drawing oyster mushrooms at different stages.
- To make a spore print: place a mushroom cap on a piece of paper for a few hours.
- Testing substrates: coffee grounds, cardboard, pasteurized straw, or wood chips.
- Examine under a microscope: compare the hyphae of the mycelium or the spores.
A great introduction to biology, ecology, and scientific observation.