Master Mushroom Cultivation in Monotub: Complete Guide
Introduction
The monotub is a very popular mushroom cultivation method, especially among beginner indoor growers. It is simple to make, fast, and requires neither sophisticated ventilation systems nor complex humidifiers. The principle is based on a perforated plastic tub equipped with filters to ensure air exchange while maintaining optimal ambient humidity. These conditions promote colonization, "pinning," and fruiting of the mushrooms.

Mushroom cultivation in monotub
Although this technique is often associated with mushroom cultivation on manure (such as Psilocybe cubensis), it is important to note that the cultivation of psilocybin mushrooms is illegal in many countries. This article does not promote it. We rather recommend the cultivation of edible mushrooms such as oyster mushrooms, namekos, and piopinos. These wood-growing species are ideal for experimenting with this method, simply adjusting the substrate according to the types of mushrooms you want to grow. This article is for informational purposes and aims to show how these mushrooms can be cultivated with simple and accessible techniques.
Necessary Materials
Here is the necessary equipment to build and use a monotub:
- Transparent plastic bin. A 60-liter bin corresponds approximately to dimensions of 60 x 40 x 35 cm. This provides enough space for a substrate 8 to 12 cm thick and good ventilation.
- Drill with drill bits for drilling holes of 2.5 cm and 5 cm.
- Microporous adhesive tape or filters to cover holes and limit contamination.
- Sterile substrate, suitable for the type of mushrooms you want to grow (lignicolous substrates or CVG substrate).
- Colonized or sterile grains (grain spawn available here).
- Spray sprayer to maintain humidity.
- Plastic sheet to create a liner at the bottom of the tray.
- Isopropyl alcohol to sterilize equipment and work surfaces.
- Nitrile gloves for handling sterile materials.
Choice of Substrate
The choice of substrate depends directly on the type of mushrooms you want to cultivate:
- Wood-growing mushrooms: such as namekos or piopinos. Use a substrate based on wood chips/sawdust like our optimal substrate. For oyster mushrooms, organic straw pellets can work well.
- Tropical mushrooms with coprophilous affinity : like Psilocybe cubensis and other similar species. Use a CVG substrate (Compost-Vermiculite-Brown rice cake) or an enriched mixture based on manure, coconut, and vermiculite.
- Coprophilous mushrooms: such as Agaricus. Use a substrate based on composted manure.

Mushroom cultivation in monotub
At Mycosphere, we offer organic sterile substrates suitable for wood-growing mushrooms as well as grain spawn for inoculation.
Monotube assembly
To build an effective monotub, here are the key steps:
-
Drill the holes: Most monotubs use Tupperware-type containers. You can customize the size and placement of the holes according to the species of mushroom you are cultivating. In general:
- Large holes (5 cm): Six holes are recommended, two on each long side and one at each end, about 20 cm from the bottom.
- Small holes (2.5 cm): Positioned about 4 to 5 cm above the intended substrate level. These holes ensure good air circulation.
To avoid cracks, start by marking the hole locations, then first drill a small pilot hole with a fine bit before using an appropriate hole saw. A tip is to melt the holes using a drill in "reverse" mode. This limits plastic chipping and creates cleaner edges. You can also heat a blade to melt the plastic.
Make sure to work in a well-ventilated area and wear a mask to avoid inhaling plastic fumes.
- Clean: Sterilize the inside and outside of the tray with 70% isopropyl alcohol, as well as all your work equipment (scissors, spatulas, etc.).
- Add a liner: Use a thick plastic sheet, ideally black, to cover the bottom of the tray. This reduces potential contamination and makes cleaning easier. Cut the sheet so that it perfectly fits the dimensions of the bottom, with a slight overhang on the sides.
Substrate Preparation
The substrate you will use depends on the species you want to cultivate. This can be a mixture of coconut coir fiber and vermiculite, straw pellets, wood shavings, etc.
In all cases, you need to moisten your substrate with the right amount of water (between 60% and 75%) and then sterilize or pasteurize it.
Example: If you have 1 kg of a coconut fiber and vermiculite mix that you want to moisten to 75%, you need to add 3 kg of water for a total of 4 kg of moistened substrate. Note that the base substrate may contain a certain percentage of moisture, and it is better to add a little less water at first, adding more later if it is too dry.

For sterilization:
- In the pressure cooker: Place the moistened substrate in a heat-resistant bag and sterilize it for 90 minutes at high pressure.
- By pasteurization: Pour boiling water over the substrate placed in a container cleaned with alcohol. Cover and let cool. This will pasteurize it sufficiently to prevent contamination. This works very well with our organic straw pellets, for example.
Once your substrate is prepared, you can move on to the next step: inoculation.

Our commitment to quality:

Our sterilized substrates are carefully manufactured to ensure an optimal composition and superior quality sterilization, suitable for wood-growing mushrooms.

Certified organic with the BE-BIO-01 label, our substrates meet the strict standards of organic farming.
Liquid Cultures and Sterile Grains

Liquid cultures are an effective method to introduce live mycelium into your substrate. They contain fragments of mycelium suspended in a sterile nutrient medium, offering faster and more uniform colonization compared to spore syringes.
Advantages of liquid cultures:
- Faster colonization because the mycelium does not need to germinate.
- Ease of use with sterile grain spawn bags equipped with injection ports.
- Reduction of contamination risks related to spores.
Preparation and use:
- Sterilization: Make sure your hands, the syringe needle, and the injection ports are thoroughly cleaned with isopropyl alcohol.
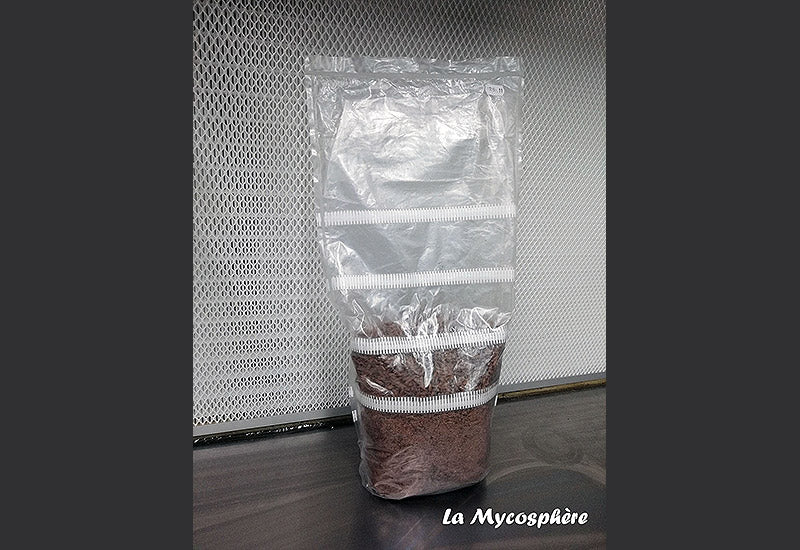
- Injection: Inject 2.5 to 5 ml of liquid culture into a bag of grain spawn grains via the injection port.
- Incubation : Place the bag in a clean, dark place at a temperature between 20 and 25 °C. After 1 to 2 weeks, you can see the mycelium start to spread. At this point, you can gently shake the bag, while keeping it well sealed, to distribute the mycelium throughout the entire grain spawn and speed up the colonization process. The grain should be fully colonized in 2 to 4 weeks
The colonized grain spawn bags are then ready to be integrated into your substrate in the monotub. Some simply use our sterilized grain spawn as a fruiting substrate (not for wood-loving mushrooms), and fruit them using the monotub box as a fruiting tent. In this case, it is not necessary to use another substrate. You just need to open the plastic bag where the mushrooms start to grow, and possibly remove the plastic completely if it is obstructive. The box will play a role in maintaining humidity. For this option, you can therefore skip the next step of substrate incubation.

Incubation
Place the monotub in a stable and temperature-controlled environment, ideally between 20 and 25 °C, for a period of 2 to 3 weeks.
During this phase, check your tray daily. You will notice white spots gradually spreading from the grain spawn, until they completely cover the surface of the substrate. This indicates healthy and active growth. Droplets of exudate, an amber liquid naturally produced by the mycelium, may appear on the substrate, signaling good hydration and rapid colonization.
Also watch for signs of "pins" formation: small vertical white hyphae developing into dense knots, indicating imminent fruiting. During this period, ensure that humidity and temperature levels remain constant. Condensation on the lid and substrate is a good indicator of adequate hydration.
However, be attentive to mold or unusual colors, which could indicate contamination. Proactive management ensures optimal conditions for the growth and health of your mushroom crop.
The Casing Layer
Once the mycelium starts to form knots or "pins" on the substrate, it is time to add a casing layer. This layer mimics forest leaves, creating an optimal environment for mushroom fruiting.
Commonly used materials:
- Coir (coconut fiber)
- Peat
- Vermiculite (make sure it is certified asbestos-free)
Apply a thin layer of 1 to 2 cm of casing on the substrate and lightly moisten it using a spray bottle. The layer should be well hydrated, but without excess water. Leave the cover slightly offset to improve air exchange and reduce the risks of CO2 accumulated.
During this period, continue to spray water daily and expose the monotub to indirect light. Although mushrooms do not perform photosynthesis, light is essential to guide their growth.
Mushrooms generally reach maturity one to two weeks after the casing layer is added. Harvest them before their caps are fully open for better quality and flavor.
Fructification
Fruiting is a key stage in the mushroom cultivation cycle. Once the substrate is fully colonized, expose the monotub to indirect light to encourage fruit formation. Maintaining high humidity, between 90% and 95%, is essential to support mushroom growth.

White button mushroom cultivation
Optimal conditions:
- Humidity: Regularly spray water inside the monotub to maintain humidity. The droplets on the substrate are a good indicator.
- Ventilation: Leave the lid slightly open or drill additional holes to improve air exchange and prevent the accumulation of CO2.
- Light: Soft, indirect light, about 6 to 12 hours per day, helps guide mushroom growth.
Monitor fruiting: Check daily for the appearance of "pins" or young mushrooms. The first signs include white hyphae that thicken into dense knots. These "pins" quickly develop into mature mushrooms within one to two weeks.
A light condensation on the walls of the tray is normal and indicates adequate hydration. However, watch for signs of contamination, such as green or black mold.
Harvest: Harvest the mushrooms when their caps are still rounded and before they fully open. This ensures better quality and flavor.
With proactive management and attentive care, the fruiting phase will result in an abundant and high-quality harvest.
Our commitment to quality:
We produce our mycelia under laboratory conditions, thus ensuring the purity of the varieties and optimal quality.
Certified organic with the BE-BIO-01 label, our myceliums comply with the strict standards of organic farming.


