Ecological and innovative materials, mycomaterials have multiple potentials: thermal and acoustic insulation, packaging, bioremediation and filtration, design, etc.
mycomaterials are materials composed of raw materials that have been transformed and fused with mushroom mycelium.
The applications of mycomaterials are varied, falling mainly into three main families:
- Insulating Panels: Offer excellent acoustic and thermal insulation, ideal for applications in construction and architecture.
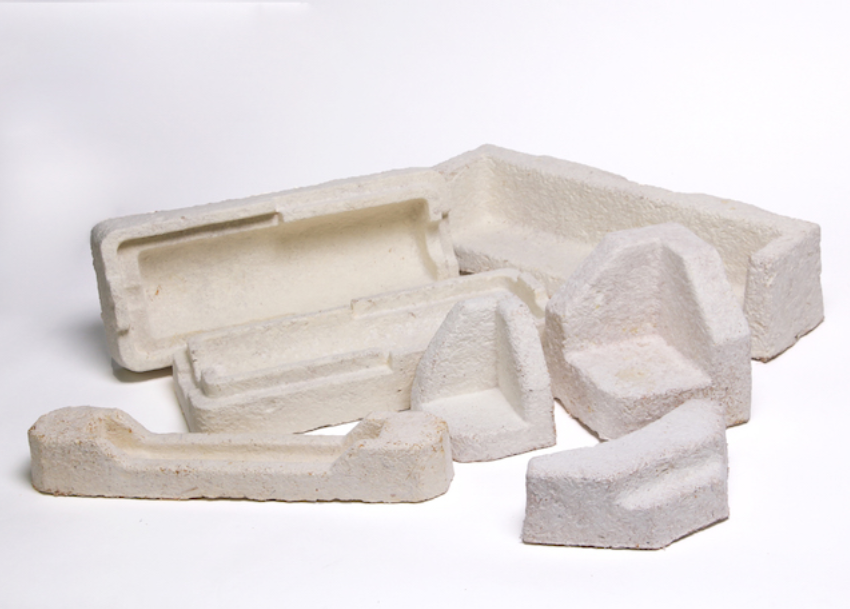
- Objects and Packaging: These innovative shapes can replace polystyrene in packaging, offering a biodegradable and ecological alternative.
- Fungal Leathers: A sustainable alternative to animal-based leathers, suitable for fashion and leather goods.
Physical characteristics
Mycomaterials are distinguished by their unique appearance and texture:
- Visual Appearance: Generally white in color, with a smooth surface.
- Texture: A soft, fluffy feel, reminiscent of the softness of certain fabrics.
- Renewable Resources: Made from renewable resources, unlike materials from the petrochemical industry.
- Less Energy and Emissions: Production requires less energy overall and generates fewer greenhouse gas emissions.
- Biodegradability: 100% biodegradable, decomposing naturally without leaving toxic waste, ideal for packaging replacing single-use plastics.
- Compostability: Can be composted, re-entering the natural nutrient cycle.
- Thermal and Acoustic Insulation: Interesting properties for the manufacture of insulating panels, helping to reduce energy consumption in buildings.
- Natural Resistance: Mycelium makes substrates naturally resistant to water and fire.
- Insulation Panels
-
Ecological Packaging
Mycelium is used to create biodegradable alternatives to polystyrene and other synthetic packaging materials. These packaging can be designed to protect various products during transportation, and they decompose naturally after use.
-
Vegetable Leather
Mycelium can be grown and processed to create a leather-like material, often called fungal leather. This vegetable leather is used in fashion and leather goods, offering a sustainable and ethical alternative to animal leather.
-
Furniture and Decoration
Chairs, tables, and other interior decoration elements can be made from mycomaterials, offering a unique design and a reduced ecological footprint.
-
Electronics and Car Components
Mycomaterials are also being explored in the electronics and automotive sectors for the manufacturing of lightweight and durable components.
-
Textiles and Clothing
Some projects are experimenting with mycomaterials to create innovative textiles, offering an alternative to synthetic fabrics.
These panels are used in construction for thermal and acoustic insulation. They are light, resistant, and offer good insulation, while being entirely biodegradable.
How to produce mycomaterials?

The different steps The production of mycomaterials is similar to the first part of classic mushroom production:
- The choice of substrate and variety
- pasteurization
- inoculation
- incubation
- molding
- drying
1) The choice of substrate and variety
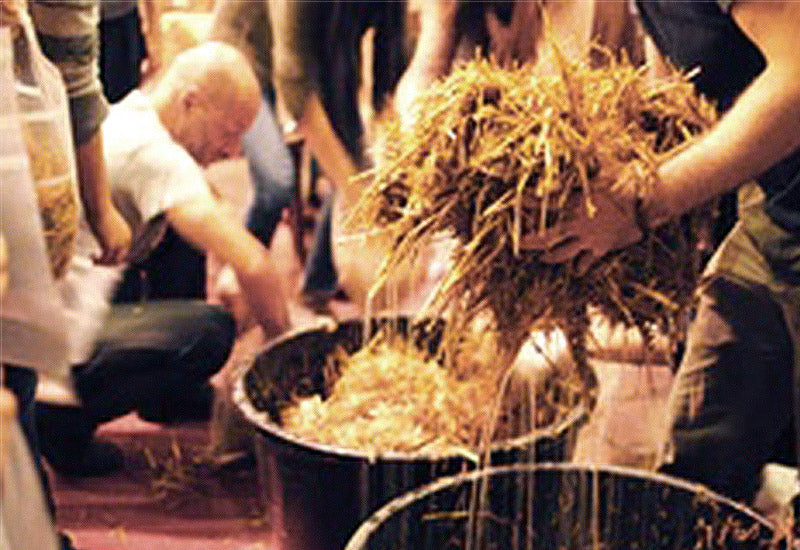
There are a multitude of different substrates that can be used: cereal straw, hemp fibers, wood shavings, sawdust, cardboard, residues from the food industry, various textiles, coconut shells, etc.
Given the ecological approach that often accompanies projects around myco-materials, the substrates generally chosen also have the objective of recycling waste from other activities and promoting local materials to reduce transport and the carbon impact.
Beyond these ecological considerations, there are also technical aspects to take into account to ultimately obtain a good quality product:
The varieties used for biomaterials are mushrooms lignivores & saprophytes : they naturally degrade dead wood and more generally carbonaceous materials.
A substrate too rich in nitrogen or sugar will be more conducive to bacteria, and you will therefore have to “fight” more with more energy to put into the sterilization of the substrate and the sterility of the inoculation and incubation processes.
Conversely, a very carbon-containing substrate will be called “selective” because few microorganisms other than fungi can develop on wood chips.
However, a lack of nitrogen and sugars can result in too weak a mycelium, too slow and possibly incomplete colonization of the substrate, and therefore poorer quality results.
➡️ Our advice: We generally use a carbon base such as straw or sawdust/wood shavings (preferably hardwood) at a rate of 80-90%, which is enriched with a richer material such as cereals , coffee grounds, hay or other at a rate of 10-20%.
Mycelium is a living being, which needs oxygen to live, to colonize and decompose its substrates.
A substrate that is too dense or waterlogged will not allow it to breathe sufficiently and will therefore be more conducive to anaerobic bacteria, for example. A substrate that is too dry will result in poor colonization of the substrate.
➡️ Our advice : We recommend a humidity rate ranging from 60% for a sawdust-based substrate to 70% for straw-based substrates.
Depending on the intended use, the materials will need more or less rigidity. For insulating panels, for example, we will prefer a fibrous texture.
The choice of mycelium is of course important because some are stronger than others. The mycelium will act as a binder, like a glue which will hold all the materials together. What will provide strength are the fibers (crushed cereal straw, plant stems, burlap, etc.).
Just as in the construction of buildings, we will “reinforce” the concrete: we will add metal structures to the concrete to give it better solidity and resistance.
The fibers will also ventilate the substrate, and therefore improve its insulating appearance. However, fibers that are too long will not be practical to use because they will not fit well into the molds, risk piercing the bags, and ventilating the substrate too much.
➡️ Our advice: Use a mixture of crushed straw (1-3 cm ideally) with 10 to 20% sawdust (our optimal substrate is very suitable).


The choice of variety:
- reishi (ganoderma lucidum)
- turkey tail (trametes versicolor)
- oyster mushroom (pleurotus ostreatus)
The reishi and the tramète are part of the “polypore” family of mushrooms: they are naturally very rigid mushrooms that you can find on tree trunks (alive or dead). These mycelia are very “aggressive”, which means that they are quick to colonize a substrate and have a good capacity to react to other competing micro-organisms. By playing with the maturation times, these mycelia will also give different colors.
The reishi mycelium can turn yellow, orange and red. That of the tramet will start with rather beige and dark brown colors.

Above a bundle of reishi at the beginning of fruiting
Oyster mushroom mycelium is also regularly used. Like the 2 previous mycelia, it is fast and adapts to a multitude of different substrates. It is a little less solid and dense than polypores, however it is one of the most widespread mycelia due to the cultivation of oyster mushrooms for food.
The yellow oyster mushroom and thepink oyster mushroom can also be used for visible coloring on their mycelium, which can give interesting results from an artistic point of view. Pink oyster mushroom mycelium has a more fragile texture, however.
2) Pasteurization or sterilization
The aim of this step is to eliminate the majority or all of the original micro-organisms present in the substrate to leave room for the chosen mycelium.
Insufficient pasteurization will generally result in “contaminations”: typically, this will be bacteria or mold which will colonize all or part of the substrate, giving a result which will be significantly less good in terms of expected quality, or even completely unusable depending on the conditions. case.
There are different ways to pasteurize or sterilize a substrate, but that is not the focus of this article. To begin, we recommend the 2 simple methods of pasteurization with lime or heat.

3) Inoculation, or seeding of the substrate
After pasteurization and cooling to a temperature below 40°C, the substrate will be mixed with the mycelium. We generally use mycelium on grain because this will allow good dissemination of the mycelium in the substrate, as well as a supply of energy for the mycelium and therefore faster colonization.
The inoculation rate may vary depending on the substrates used and the sterility rate of the techniques. In optimal laboratory conditions, we will use 1 to 2% mycelium.
For a poor substrate (= richer in carbon) and non-sterile inoculation conditions, we will put between 5 and 10% of mycelium on grain. A higher inoculation rate allows faster colonization and therefore reduces the risk of failure linked to contamination with other microorganisms.
The containers:
The substrates are generally put in perforated plastic bags or equipped with filters (our unicorn bags, plastic sheath, or buckets). The use of plastic at this stage has several functions: substrate capacity, maintaining a constant humidity level, preventing contaminants (micro-organisms and insects) from entering the substrate. The professional bags are equipped with a microfilter which allows the supply of oxygen while preventing the entry of bacteria or mold spores.
On a small scale, and to reduce the carbon impact, it is possible to use reusable containers. Note, however, that these must be really thoroughly cleaned to avoid recontaminating the substrates after pasteurization, and they must also allow the mycelium to breathe (for example a bucket with a cotton ball).
4) Incubation
This is the phase where the mycelium will colonize its substrate and digest it. For this step, the mycelium needs heat: an ideal temperature between 20 to 25°C. Light has little impact at this stage, but it is generally recommended to place substrates in the dark. As soon as the substrate is colonized, you can move on to the next step.

5) Molding
After complete colonization of the substrate by the mycelium, it is placed in its mold, which will give it the desired shape. The substrate is broken, crumbled and distributed evenly. Depending on the projects and objectives, the molds can be made, for example, with a 3D printer, or for amateurs with recycled objects (vase, bottles, etc.). Although the substrate is already colonized by the mycelium, it is important to work cleanly and disinfect everything that comes into contact with the mycelium.
After molding, the substrate is put back into incubation for 3 to 7 days for further fusion of the mycelium fragments and better solidity. During this phase, the mycelium still needs oxygen and constant humidity. Depending on the size of the molds, it is sometimes necessary to pierce them for better air supply.
It is also possible to incubate the mycelium directly in its final mold after inoculation. However, it should be noted that crumbling and fragmenting the mycelium after colonization of the substrate generally allows for better solidity subsequently.
Results may vary depending on materials, variety, temperatures, humidity in the air and substrate, incubation time, etc. Mushrooms are very responsive to their environment. It's up to you to experiment to better understand how the mycelium works and find the processes that best suit your expectations.

6) Drying
When the result is achieved, drying is carried out to stop the activity of the mycelium and thus prevent it from continuing to degrade the substrate and go into fruiting. Drying can be done at low or high temperature. It is important to note that mycelium tends to retain moisture, which prolongs drying time. Even if the exterior appears dry, the interior of the object may remain damp, encouraging the appearance of small molds.
On a small scale, it is possible to dry them outside on sunny days or in the oven. In the oven, you can use rotating heat with a temperature if possible below 80°C. Alternate 1 hour of heating, 1 hour of rest, regularly opening the oven door to evacuate humidity. The total duration, depending on different factors, generally varies between 6 and 48 hours.
On a professional scale, the use of specific dehydrating ovens is recommended. It is essential to have control of temperatures and air renewal for uniform and sufficiently rapid drying, guaranteeing a good quality result.


We offer you 2 options:
-
Easy Level:
Our ready-to-grow bundles of reishi . All you have to do is crumble it finely, put it in the mold of your choice, then dry it after colonization. -
Average level :
- We recommend mycelium on reishi grains .
- Use our microfilter bags for incubation.
- And our straw pellets as a substrate.
- Follow the different steps mentioned above.

It’s also a great activity to do with children. Success is guaranteed. It’s a great way for them to come into contact with mycelium and the mysterious kingdom of mushrooms. From there, we can discuss with them how they function, the way they feed, their modes of reproduction. And it is also an opportunity to address topics on ecology and the economy of natural resources.
You can also choose our DIY Pack with everything you need inside.
For further :
- Growing Gourmet & Medicinal Mushrooms, Paul Stamets.
- Mycelium Running, Paul Stamets.
- Radical Mycology, Peter McCoy
- Compressive behavior of anisotropic mycelium-based composites (Rigobello & Ayres 2022).
Our Products for Mycomaterials

Organic Reishi Mycelium Grain Spawn
$16.00–$24.00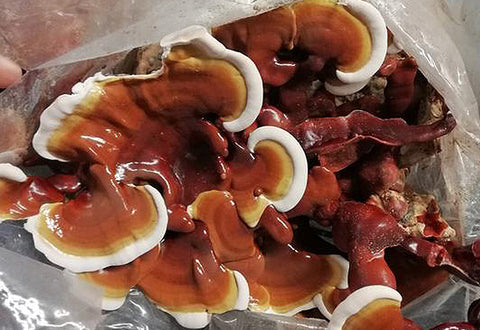

Organic Turkey Tail Mycelium Grain Spawn
$16.00–$24.00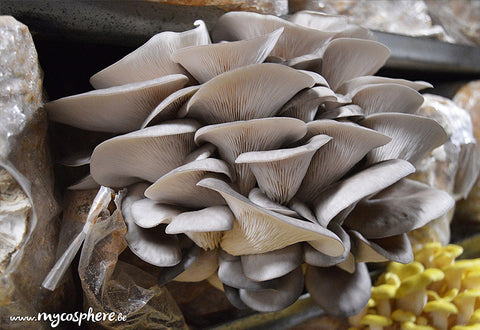
Organic Blue Oyster Mushroom Grain Spawn
$16.00–$24.00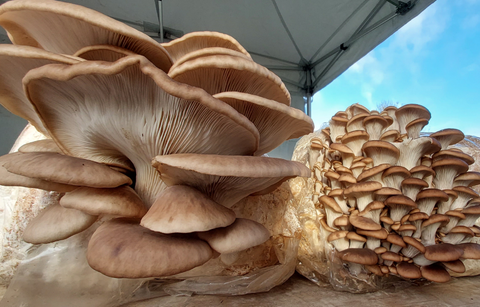
DIY Mushroom GROW KIT
$11.00–$32.00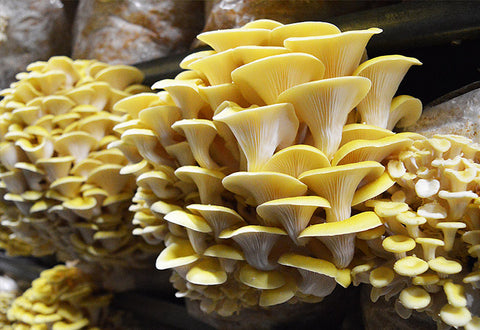
Organic Yellow Oyster Mushroom Grain Spawn
$16.00–$24.00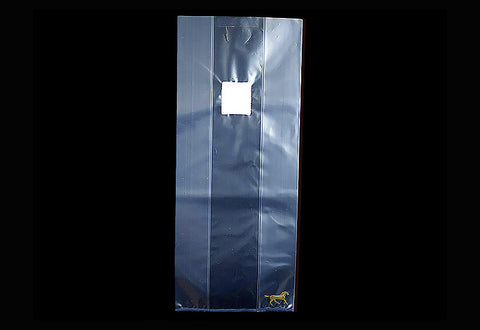
Unicorn 3T bag
$10.00–$594.00
