
DIY Mushroom Kit
- 🍄 DIY ORGANIC Oyster Mushroom KIT: All the necessary materials in one box to make your own oyster mushroom growing bundles.
- 🌱 EASY CULTURE : Super simple to do at home, at school, with your children, your friends, thanks to our instructions .
- 💪 HIGH YIELD: 0.6 to 1 kg per ballot.
- 🍽️ NUTRITIVE QUALITY: Oyster mushrooms are rich in proteins, vitamins and minerals, perfect for a balanced diet.
- 🌍 ORGANIC PRODUCTION: Certified “BE-BIO-01”, without pesticides or GMOs, environmentally friendly.
- ⏳ STORAGE: You can store the mycelium for 1 month in the refrigerator until ready to use.
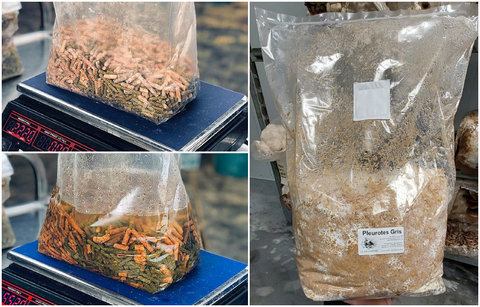
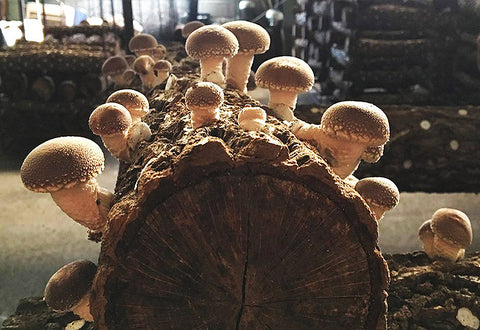
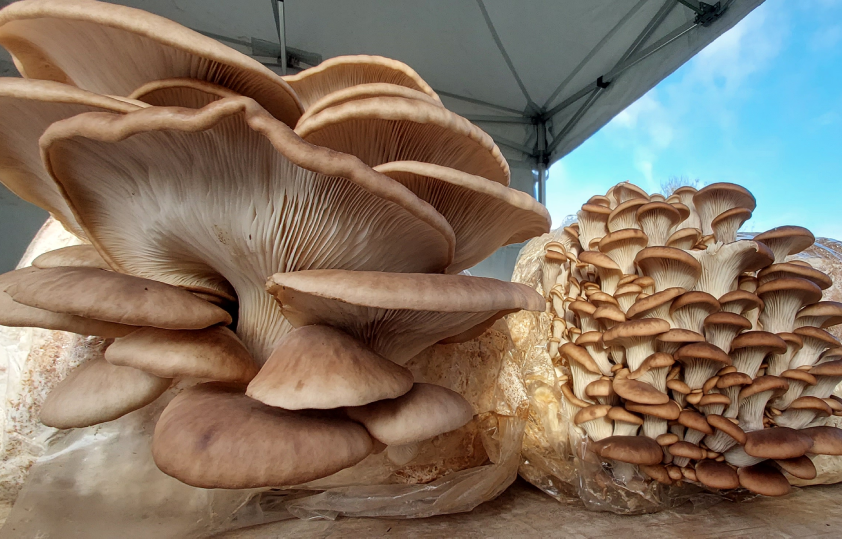
Each Bag Can Produce 2 to 3 Harvests: A total of 600 g of oyster mushrooms per bag, or 3 kg for the 5 bags. After each harvest, let the bag rest for 3-5 days before rehydrating it by soaking the bale overnight in a basin of water.
To spread out the harvests, place some blocks in the refrigerator or in a cooler room after colonization.
Objects made of mycelium?
You can also try the "mycomaterials" mode to make objects from mycelium by choosing the "reishi" variety. More information in our mycomaterials tutorial.
Choose the Mini or Maxi DIY Kit?
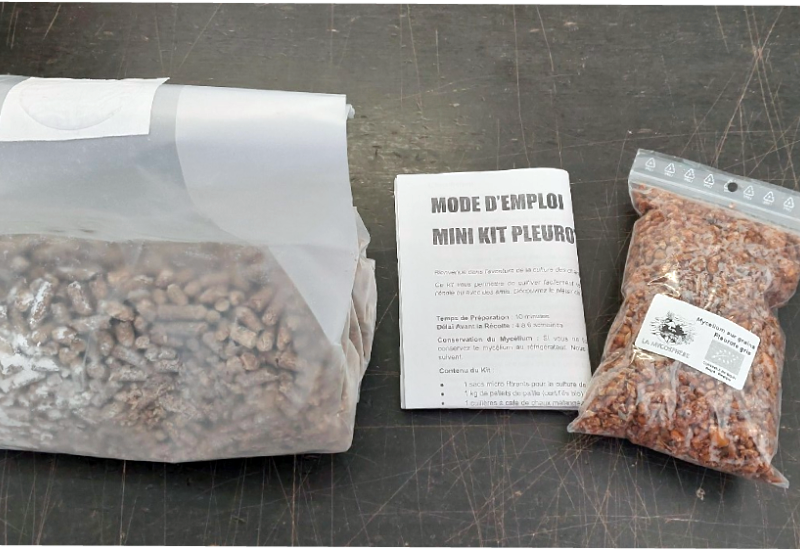
Mini DIY Kit |
Maxi DIY Kit |
| ✔️ 1 bag with breathable micro-filter | ✔️ 5 bags with breathable micro-filter |
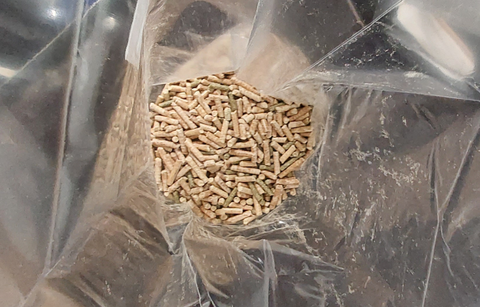
| ✔️ 1 kg of straw pellets (certified organic) and lime | ✔️ 5 kg of straw pellets (certified organic) and extinguished lime |
| ✔️ 300 g of oyster mushroom mycelium | ✔️ 1.5 kg of oyster mushroom mycelium |
| ✔️ Instructions for use | ✔️ Instructions for use |
| ✔️ Pair of gloves | |
| ✔️ 1 mini spray | |
| 👉 Harvest potential: 0.6-1 kg of oyster mushrooms | 👉 Harvest potential: 3-5 kg of oyster mushrooms |
Precautions
- Work as cleanly as possible: wash work surfaces and your hands before starting.
- Lime, although extinguished, can be irritating to the hands. Avoid direct contact or wash your hands immediately.
- Durations may vary depending on temperatures. Cold slows down the mushroom's metabolism, which can affect the distribution of harvests.
- It is recommended to use the mycelium all at once. If you still plan to use it multiple times, make sure to work cleanly, properly reseal the bag after use. Store it in the refrigerator and use it within 2-3 weeks.
Important Note: Most myceliums are made to order. Depending on available stock, delivery time can take 1 to 3 weeks.
Educational Pack
If you want to organize an activity with your students or children about mushrooms, this is the perfect kit.

Educational Objectives
- Understand what a mushroom is and its role in nature.
- Explore the life cycle and metabolism of mushrooms.
- Discover the different kingdoms of life and the classification of mushrooms.
- Raise participants' awareness of the importance of mushrooms in ecosystems.
- Identify the main families of mushrooms.
Topics Covered
-
Definition of a Mushroom
Understand that the mushroom is the fruit of a mycelium, not a plant. -
Mushroom Metabolism
Study how mushrooms feed and grow. -
Mushroom Reproduction Cycle
Observe and explain the stages of mushroom growth. -
Kingdoms of Life
Place mushrooms in biological classification. -
Ecological Role
Discuss the importance of mushrooms in ecosystems, as decomposers and symbionts. -
Mushroom Families
Discover the characteristics of the main families: Basidiomycetes (like oyster mushrooms), Ascomycetes, and Zygomycetes. Understand the functional differences between saprophytic, symbiotic, and parasitic mushrooms.
Scientific Project Ideas on Mushrooms for Children
- Compare Environments
Get two mushroom growing kits of the same type and slightly modify their growing environments. The main growth factors for mushrooms are humidity, light, and airflow. You can try changing the amount of misting on one kit, changing the amount of sunlight one kit receives, or changing the amount of airflow for one kit. The kit receiving different conditions is the experimental kit. Keep the other kit in ideal conditions as a control and observe what happens! Remember, change only one factor at a time to get the best possible data! Does this change the number of mushrooms that grow? Does this change the distribution of mushrooms on the block? Do the mushrooms in the experimental kit look different? Record your observations!
- Describe and Identify Mushrooms
Although you already know what type of mushrooms your kit will grow, you can work on the mushroom identification process using your kit. Photograph or draw your mushrooms through the different growth stages, and demonstrate how to use the following techniques to identify mushrooms:
Look at the mushroom: What is the color of the cap? How is the stem formed? Is the cap convex, flat, conical?
Look under the cap for structures producing spores. Does the mushroom have gills, pores, or teeth? Does the mushroom have warts, a veil, a ring?
Touch the mushroom: Is the top of the mushroom cap smooth? Velvety? Dry? Scaly? Is the stem (or stipe) fuzzy or fibrous?
Smell the mushroom: Many mushrooms are identified by their smell. These odors can be the normal mushroom smell we are all used to with button mushrooms, or they can smell rotten or like almonds, or even like cinnamon.
- A spore print
Remove the stem from the cap and place the cap gill-side down on a sheet of paper. Some mushrooms (like shiitake) produce white spore prints, so you might want to make one on white paper and one on colored paper. Cover the mushroom caps with a bowl or other lid to prevent drafts from moving the spores and leave them for a few hours. After waiting, you should be able to carefully lift the mushroom caps and see the spores left behind on the paper! Mushrooms leave spore prints in many different colors, so this is a useful technique!
You can also find a wild mushroom (during autumn or spring) and compare your observations between your home-grown mushrooms and wild mushrooms! Please note: Wild mushrooms should never be consumed without 100% positive identification!
- Reproduce the mycelium
Take a nice piece of mycelium and mix it with different substrates such as coffee grounds, pasteurized straw, cardboard, wood chips, etc. See how it reacts and how the mycelium manages to colonize or not these different environments.
- Observe under the microscope
If you have a microscope, you can observe the "hyphae" (mycelium filaments), or the mushroom spores. Compare with other varieties of mushrooms collected in the wild, for example.
These are just a few ideas for scientific projects on mushrooms; use your imagination! Be curious! Ask questions, and see if your mushroom growing kits can help you answer them! Mushrooms have a lot to teach us about their life cycle, their ecosystem, and the global environment. But most of all, have fun!
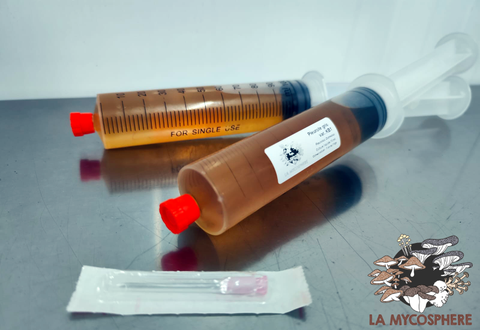
Liquid Culture Syringes G1
€14,90–€39,50
Mycelium on Organic Grey Oyster Mushroom Grains
€13,90–€20,80